
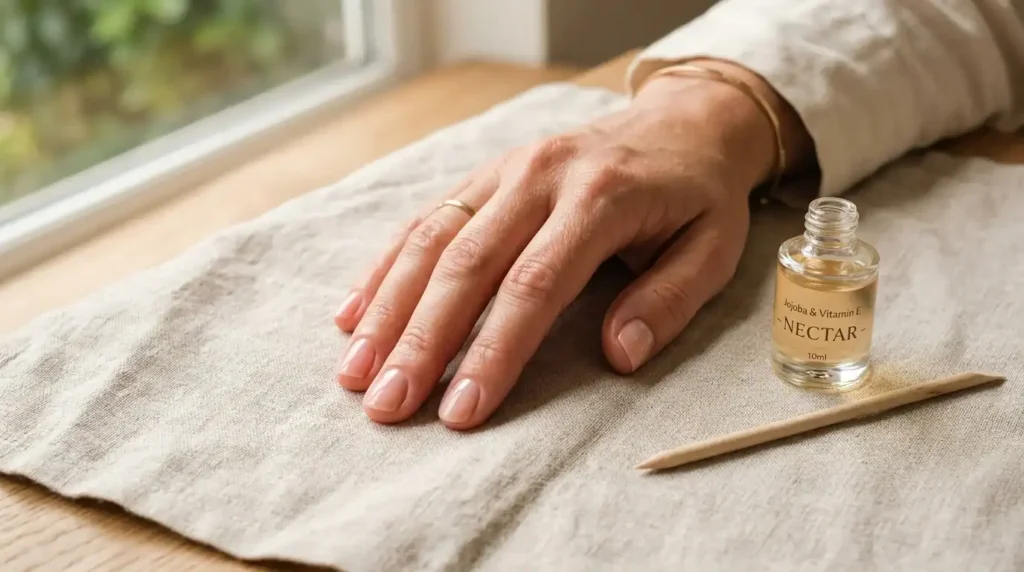
Your nails peel. They split at the corner right when you finally grow them out. You buy polish, you buy oil, and nothing sticks.
That frustration is normal, and it is fixable. Most weak nails come from a routine gap, not bad genetics.
By the end of this guide, you will have a real nail care routine, one you can run in ten minutes a night. No salon trip is required.
A good nail care routine has four parts
- Clean gently.
- Use cuticle oil daily.
- Apply a protective base coat.
- Buff weekly with a fine-grit file
Do these four things every day for four weeks. You’ll notice less peeling, fewer hangnails, and a smoother nail plate. Skip harsh acetone removers and metal files in the meantime. Consistency matters more than any single product.
Everything You Need Before Starting

You do not need a full salon cart; you need a short list of the right tools used in the right way.
Here is your nail care starter checklist
- A glass nail file (metal files cause micro-tears in the nail plate)
- A soft-bristle nail brush for cleaning under the free edge
- Cuticle oil (jojoba or vitamin E base, not mineral oil alone)
- A rosewood stick for gentle cuticle pushing
- A buffer block (three or four grit levels)
- A ridge filler base coat
- Acetone-free polish remover
- Hand cream with an occlusive balm like shea butter
Optional but highly recommended: a nail dehydrator and primer duo. Nail techs use this pair before polish to remove surface oil from the nail plate. This helps any polish, whether gel or regular, stick to the nail for days longer without lifting at the edges. A ten-dollar bottle changes your polish game more than any top coat will.
The Foolproof Nail Care Routine, Step by Step
Step 1: Remove Old Polish the Right Way

Skip pure acetone. It strips moisture from the nail plate and the skin around it, and dry nails crack. Use an acetone-free remover with a soft cotton pad, and press instead of scrubbing.
Hold the pad on the nail for five seconds first. Let the polish soften. Then wipe in one direction, not back and forth.
Back-and-forth scrubbing roughens up the nail surface. You want a clean canvas, not a stressed one. This step sets up everything after it, so do not rush past it.
Step 2: Trim and Shape with the Grain

Wet nails bend and split when you clip them, so trim nails dry. Cut straight across first, then round the corners with light strokes.
Now pick up your glass file. File in one direction only, from the outer edge toward the center. Never saw back and forth.
That sawing motion is the top cause of splitting at the corner, and most people do it without noticing. A glass file also seals the nail edge as you go, which a metal file cannot do. Your nail edge should feel smooth, not rough, when you run a finger across it.
Step 3: Push, Do Not Cut, the Cuticles

Soak fingertips in warm water for two minutes to soften the skin. Then take your rosewood stick and push the cuticle back in gentle circles, never a hard scrape.
The cuticle is a seal. It keeps bacteria and fungus out of the nail matrix, the living tissue under your skin that actually grows your nail. Cut that seal, and you open a door to infection.
Save cuticle clippers for true hangnails only, the small torn flaps of skin. Everything else gets pushed back, never sliced. This one habit swap saves more nails than any product on this list.
Step 4: Buff in Light Passes

Grab your multi-grit buffer block. Start with the coarsest side and move to the smoothest, using light, even strokes across the whole nail.
Buffing evens out ridges and gives polish a smooth base to grip. But over-buffing thins the nail plate, so three or four passes per side are the limit here.
Do this once a week, not every day. Nails need that top layer intact to stay strong, and daily buffing wears it down quickly.
Step 5: Massage in Cuticle Oil, Every Single Day

This is the step people skip, and it is the one that matters most. Warm a drop of cuticle oil between two fingers, then massage it into the cuticle and the nail plate itself.
Oil does not just sit on top of keratin; it helps the nail plate retain flexibility. Flexible nails bend under pressure instead of snapping. Brittle, dry nails do the opposite.
Do this at night, right before bed, so the oil has hours to absorb instead of rubbing off on a keyboard or a steering wheel. Two months of nightly oil will change the texture of your nails more than any single trip to the nail bar.
Step 6: Prime, Then Protect with a Ridge-Filling Base Coat

Once nails are shaped, buffed, and oiled, wipe the nail plate with your dehydrator and primer duo. This removes leftover oil so the polish actually bonds.
Next, apply a thin coat of ridge-filling base coat. This coat smooths out bumps and gives your topcoat something even to sit on top of.
Let it dry fully, a full two minutes, before you add color. Rushing this step is why polish chips within two days instead of lasting a full week.
Step 7: Choose a breathable, low-chemical polish

Pick a natural nail polish labeled “5-free” or higher, meaning it skips formaldehyde, toluene, DBP, and other harsh solvents. Breathable formulas allow some moisture and oxygen to pass through the polish film.
That matters for nail health over months of continuous wear. Trapped moisture under old-school polish is a common cause of soft, weak nails that peel in layers.
Apply two thin coats rather than one thick one. Thin coats dry harder and resist chipping far longer than a single heavy layer.
Where Most Beginners Go Wrong in Nail Care

Mistake 1: Cutting the cuticle instead of pushing it back. This breaks the natural seal around the nail matrix, inviting infection. It also leads to rough, overgrown cuticle skin as your body tries to heal the wound. Fix it by switching to a rosewood stick and saving clippers for actual hangnails.
Mistake 2: Peeling off gel or regular polish instead of soaking it off. Peeling pulls layers of the nail plate away with the polish, leaving nails thin and see-through in patches. Fix it by soaking a cotton pad in remover, wrapping the nail in foil, and waiting a full ten minutes before any polish comes off.
Mistake 3: Skipping cuticle oil because nails “look fine.” Dry nails can look fine on the surface while staying brittle underneath, and the damage only shows up weeks later as splitting. Fix it by building a nightly oil habit now, before problems start, not after.
Expert Tips for a Stronger Nail Care Routine in 2026

Nail techs are moving away from harsh e-file buffing toward hydration-first routines, and the science backs that shift. A nail plate with the right moisture balance flexes instead of cracking under daily stress, like typing or dishwashing.
Try the “oil-first” trick: apply cuticle oil, wait one full minute, then apply hand cream on top. The oil seals moisture in rather than sitting on the surface, and this two-layer order locks in more hydration than cream alone.
Rotate your nail file grit like you rotate skincare. A 240-grit file works for weekly shaping, but drop to a gentler 400-grit for the two weeks after any gel removal, when nails run thin and need a lighter touch.
Nail Care Routine FAQs
How long does it take to grow out healthy nails? Nails grow about 3 mm a month, so a full nail replacement takes three to six months. In just four weeks of a routine, you’ll notice less peeling and fewer hangnails, even before full regrowth is complete.
Can cuticle oil really make nails grow faster?
Oil does not speed up growth at the nail matrix, but it stops breakage that makes nails look shorter than they are. Less breakage means you keep more of the length your nails have already grown.
Is biotin worth taking for nail health?
Biotin can help nails that are thin from a true deficiency, though most people already get enough through their diet. Pair any supplement with a topical routine for the visible results that people actually want.
How often should I let my nails go bare?
Give nails a polish-free week every six to eight weeks, especially after gel. That break lets you check nail thickness and catch dryness before it turns into splitting.
What is the fastest fix for a hangnail?
Snip the torn skin flap with clean, sharp cuticle clippers, close to the base but not into healthy skin. Follow with cuticle oil right away to calm the spot and stop it from catching on fabric.
Your Nails, One Month From Now
A nail care routine is not one dramatic fix; it is small, repeated steps that stack up over weeks. Start tonight with one drop of cuticle oil, and let the rest of this routine build around it.
By Sheila| Independently researched and tested


