
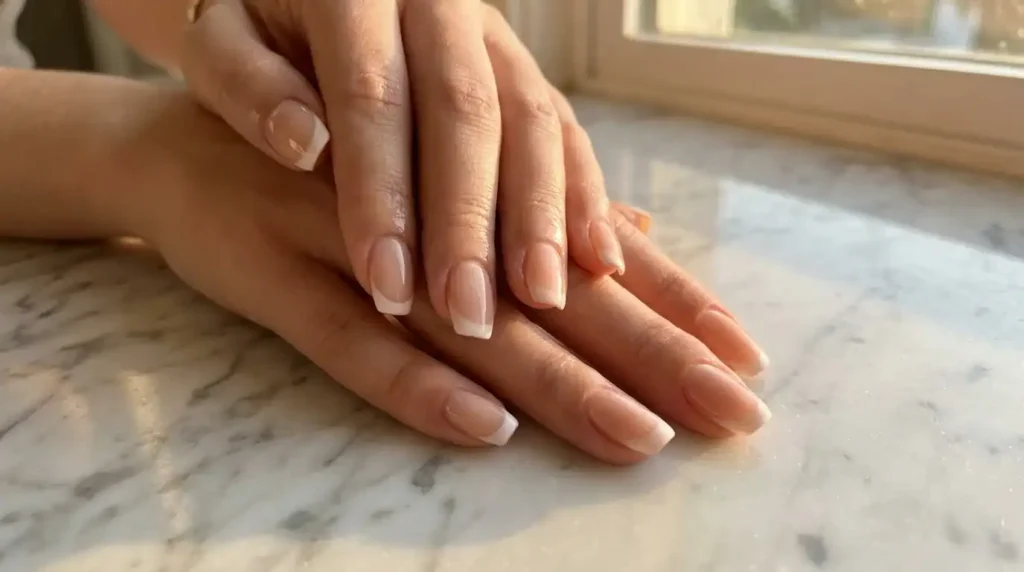
Your first French tip nail design looked crisp on your right hand. Then you switched hands. The smile line wobbled. On one nail bed, the tip sat too low. On another, it swooped up like a smirk.
You are not bad at this. You are missing three small mechanics that pros never skip. This guide walks you through the exact fix, from prep to topcoat, so both hands finally match.
By the end, you will know how to place a guide, angle a brush, and clean a line so your French manicure designs look salon-made, not smudged.
Uneven French tips come from three things: a poorly shaped free edge, a guide or stripe placed off-center, and rushed cleanup around the smile line. Fix this by shaping each nail to the same length first, marking your tip line at the same height on every finger, and cleaning excess polish with a flat brush dipped in acetone before you cure or dry. Work one hand fully, then match the second hand to the first, not to a mental guess.
Everything You Need Before Starting
A crooked smile line is often a supply problem in disguise. Cheap guides shift. Thick polish drags. Get these ready before you touch a brush.
Your French tip nail checklist:
- Cuticle pushers and nippers
- 180-grit buffer block and a fine-grit shiner
- Isopropyl alcohol (91%) and lint-free wipes
- Nail dehydrator or primer (CND Rubber Base Bonder works well)
- Sheer nude, pale pink, or clear base polish or gel
- Opaque white gel polish or striping polish (avoid sheer whites; they streak)
- French tip guide stickers, sized for your nail width
- A thin detail liner brush, Kolinsky size 00 or 000
- Top coat, gel, or regular (Gelish Top It Off or Poshe are salon staples)
- LED or UV lamp if you’re working in gel
- Orangewood stick for cleanup
Optional but highly recommended: a dual-ended angled liner brush. It has a flat side for filling the tip and a fine point for the smile line. Most beginner kits skip this tool, and it’s the single biggest upgrade for freehand cute French tip nails.
Mindset matters too. Do not rush your dominant hand, thinking you’ll “catch up” with the other. Slow, matched pacing is what makes both hands look identical.
The Foolproof Guide to Painting Even French Tip Nails
Step 1: Shape Every Nail to the Same Length First

Before any polish touches your nails, file all ten nails to match. Use a 180-grit file in one direction, never a sawing motion. This step feels boring. Skip it, and every tip line after it sits at a different height.
Hold your hand under bright light. Check the free edge from above and from the side. A tip line only looks straight when the underlying shape is straight. Buff the surface lightly to remove shine, then wipe with alcohol. This removes oil so your base coat grips instead of sliding.
Step 2: Push Back Cuticles and Dehydrate the Nail Plate

Push cuticles back gently with an orangewood stick, never a metal pusher pressed hard. Apply a dehydrator or primer across the nail bed and let it flash dry for about 30 seconds. This tiny step stops lifting later, which is what causes tips to peel and blur at the edges within days.
Skip this, and your French tip acrylic nails or gel manicure may look great on day one and streaky by day three.
Step 3: Apply a thin nude or sheer base coat

Paint one thin coat of your nude, pink, or clear base across the full nail. Cure or let it dry fully. A thick base creates a ridge, and ridges throw off your guide placement in the next step. Two thin coats always beat one thick coat here.
Let this layer set completely before moving forward. Rushing this stage is the number one reason gel tips smudge under the lamp.
Step 4: Place Your Guide at the Same Height on Every Nail

This is where most uneven tips start. Press your French tip guide sticker onto the nail, angled to follow your natural smile line, not a straight line across. Line the guide up against the same point on the nail bed each time, usually where the pink meets the white naturally.
Press the edges down firmly with an orangewood stick so no gaps let polish bleed underneath. Check it from a side angle before you paint. A guide that looks straight from above can still sit crooked from the side.
Step 5: Paint the tip in two thin layers

Load your liner brush with white gel or striping polish. Wipe one side of the brush on the bottle rim so it holds a thin, even bead, not a blob. Starting from one corner, drag the brush in a single smooth stroke across the tip and up to the other corner.
Let this first coat dry or cure, then repeat. Two thin coats give you full opacity without the polish flooding over your guideline. A single thick coat almost always drags and pools at the corners.
Step 6: Remove the Guide at the Right Moment

For gel, cure your white layer, then peel the guide off before the top coat. For regular polish, wait until the white is tacky-dry, not wet and not fully hard, then peel slowly and steadily toward yourself. Pulling too early smears the line. Pulling too late can chip the fresh white edge.
If a little polish clings to the guide and drags, don’t panic. This is fixable in the next step, not a reason to start over.
Step 7: Clean the Smile Line and Seal It

Dip a small angled cleanup brush in acetone and trace along the edge of your tip line. This sharpens any wobble left from the guide and removes stray polish on the skin around your nail. Work under a lamp or in bright daylight so you catch every smudge.
Finish with one coat of top coat across the entire nail, tip included. Cure or let dry fully before you touch anything. This seals your smile line and adds the glossy finish that makes salon French tip nail designs photograph so well.
Where Most Beginners Go Wrong

Mistake 1: Guessing the tip height by eye. Your brain wants both hands to match, but your non-dominant hand rarely paints as precisely as your dominant one. Fix this by using the same brand of guide sticker on both hands and pressing it to the same landmark, like the edge of your cuticle, every single time.
Mistake 2: Using sheer or old, thick white polish. Sheer whites need four or five coats to look opaque, and each extra coat adds room for drag and pooling. Old polish thickens in the bottle and drags across your guide instead of gliding. Replace white polish every six months, and always test the consistency on a nail wheel first.
Mistake 3: Skipping the acetone cleanup step. New nail artists often think a clean guide placement means no cleanup is needed. Guides still let tiny amounts of polish bleed underneath at the edges. A 15-second brush cleanup with acetone is what separates an amateur French manicure design from one that looks machine-made.
Pro Secrets That Separate Amateurs from Salon-Level Tips

Freehand your second coat. Once you’re ready, paint your second tip coat freehand. Use the angled liner brush and the line from the first coat as your guide. This builds real hand control and speeds up your process over time.
Try the reverse or colored French trend. Swap classic white for a soft chrome stripe, a thin gold line, or a colored tip that matches the season. This modern spin keeps cute French tip nails from looking dated while using the exact same technique you just learned.
Blend your tip into a soft baby-boomer fade. Instead of a hard line, use a makeup sponge to dab white gel polish along the tip and blend it slightly into the base color. This softer look forgives tiny imperfections in your line, which makes it a smart choice while you’re still building precision.
Your French Tip Nails Questions, Answered
Let each layer fully dry or cure before adding the next one. Smudging almost always comes from moving to the next step too soon, especially with regular polish instead of gel.
Choose an opaque, one-coat style white gel or striping polish, not a sheer white. Brands like Gelish, OPI, or Beetles Gel are common salon picks because they hold a sharp line.
Yes, with practice. Use a thin liner brush and rest your pinky on the table to steady your hand; then paint a slow, single stroke.
With a gel top coat and proper prep, French tips typically last two to three weeks before you see noticeable lifting or growth at the base.
Yes. A thinner tip line, about one to two millimeters, actually looks cleaner on short nails than a wide classic tip.
Conclusion Remarks about French tip nail

You now have the exact steps that separate a wobbly first attempt from a matched, salon-level French tip nail design. Grab your guides, work one hand at a time, and give your smile line the slow cleanup pass it deserves. Your next set will be the one you finally post.
By Sheila Adam | Independently researched and tested


